Jump to Recipe
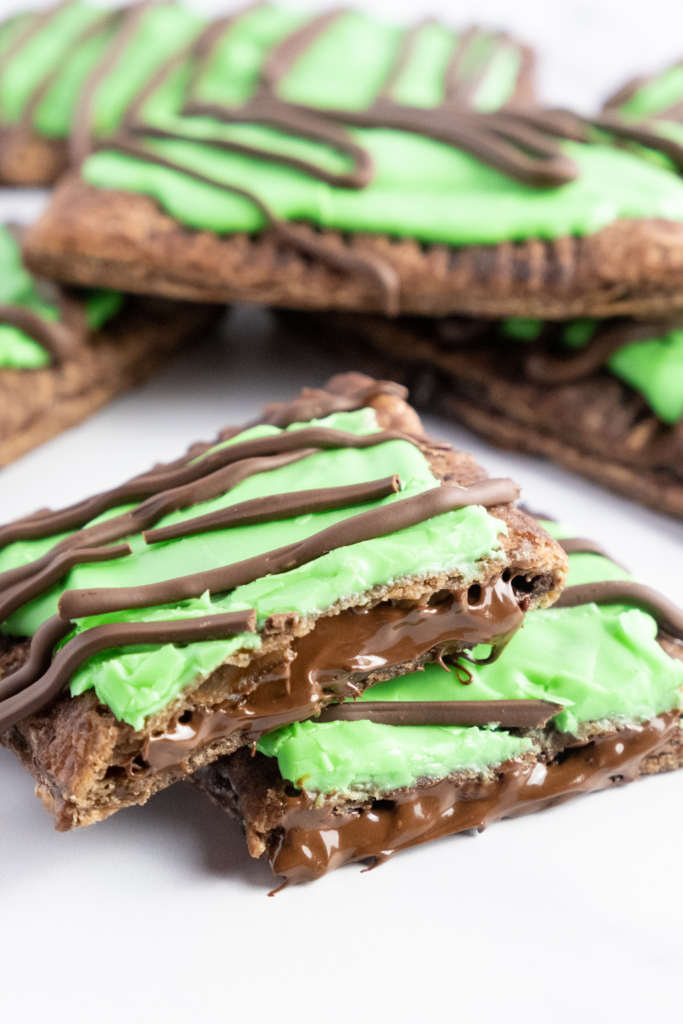
Mint and chocolate has always been one of my favorite flavor combinations, and I thought it would be the perfect flavor for pop tarts. I had no idea that apparently Pop Tarts actually had a mint chocolate chip flavor for a while. I didn’t get a chance to try them, so I don’t know how these compare to the original. But if you love mint chocolate and prefer homemade desserts to store bought ones, this recipe is for you!
Notes on Ingredients
Cocoa – Using dark cocoa will give the pastries a much darker color and make them look more like real pop tarts. I also like to make these with Dutch-process cocoa, because it has the best flavor.
Chocolate – When I want to add melted chocolate to anything, I usually try to use baking chocolate, but I used chocolate chips in the pop tart filling. If you would like even more chocolate, try adding mini chocolate chips to the filling once it has cooled.
Mint Extract – Some people have different preferences when it comes to mint. Many mint extracts that are easy to find in the store usually contain a blend of mint flavors, including spearmint. If you prefer peppermint, you will need to find peppermint extract or liqueur.
Oil and Butter – I love using a combination of oil and butter in pie crusts. The oil coats the flour, contributing to a flaky texture, while the butter provides flavor.
Notes on Technique
Filling
- Make sure to let the filling simmer for 1-2 minutes so that it will thicken. Otherwise, the filling may be too wet and will leak out the edges of the pastry.
- Chill the filling in the refrigerator at least an hour before assembling the pop tarts so that it will have enough time to firm up.
Pastry
- To ensure that the oil coats all of the flour, it helps to mix it in with your hands.
- Make sure to use very cold butter and water in the pastry, and to work quickly when adding it. This will ensure that the pastry will have flaky layers.
- The texture of the pastry will vary depending on the size of the butter pieces. For a pastry that rises a little, more like puff pastry, leave larger pieces of butter. If you want a denser crust, more like that of a real pop tart, cut the butter into smaller pieces.
- Make sure to chill the pastry for thirty minutes before rolling it out. This will make it easier to work with, and will also help prevent the butter from getting too soft.
- Flour your work surface, the top of the dough, and your rolling pin well before rolling out the pastry.
- To make 8 pastries, you will need 16 rectangles of dough – a top and bottom crust for each pastry. Roll the dough into a 20 X 12 inch (or 50 X 30 cm) rectangle. Cut it along the 20-inch side (the long side) every 5 inches (or 12.5 cm) so that you get 4 columns. Along the 12-inch side (the short side) cut it every 3 inches (or 7.5 cm) to get 4 rows. This will give you sixteen 5 X 3 inch rectangles.
- Brush any excess flour off the pastry rectangles before assembling.
Assembly and Baking
- The filling should be very thick when you are assembling the pop tarts. Try to spread it in a slightly elliptical shape in the center of the bottom crust, but don’t spread it to the edges. It will spread as it cooks, but if it spreads too far too fast, it will leak out.
- Brush the egg wash all along the edges of the bottom crust. Then, when you place the top crust over it, use a fork to seal the edges all along the sides. This should prevent the filling from leaking out.
- Chill the pop tarts for around another 30 minutes before baking. This will help keep the flaky layers in the pastry.
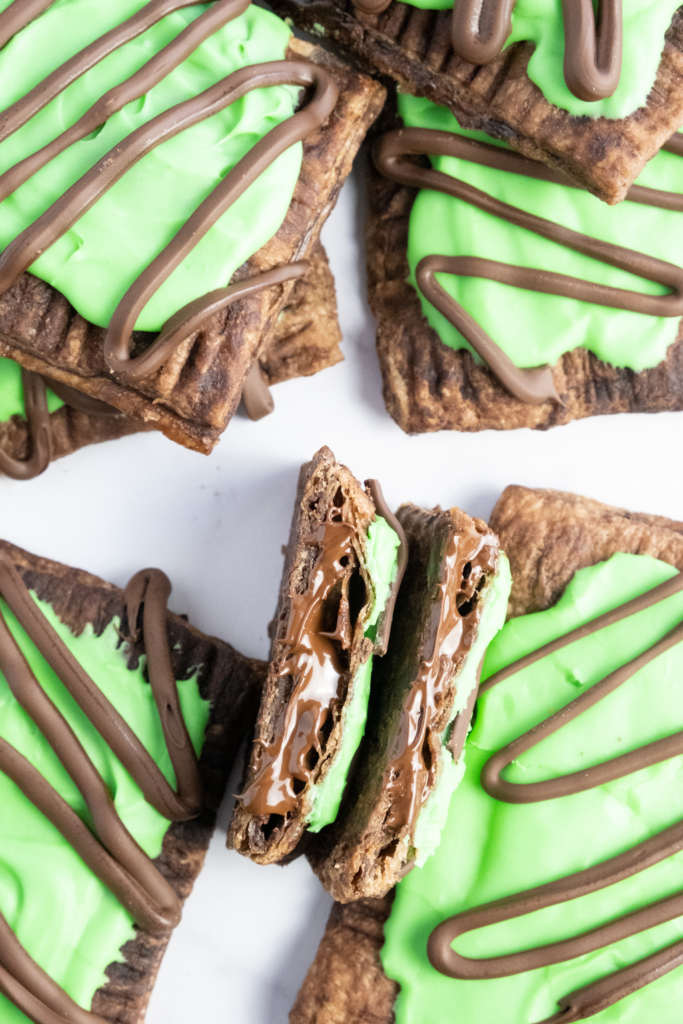
- It can be hard to tell when chocolate pastry is done. You can only really go by texture. When the pastry is done, it will look drier and flaky, and no longer limp and dense.
- These pop tarts freeze very well, but they are best thawed at room temperature. Because of the frosting and the chocolate, they can’t actually be heated in the toaster.


Mint Chocolate Pop Tarts
Ingredients
For the Filling:
- 2 tablespoons cocoa powder
- 1/4 cup sugar (50 g)
- 1 pinch salt
- 1 tablespoon butter
- 3 tablesoons milk
- 2.5 ounces chopped semi-sweet chocolate (70 g)
- 1 teaspoon mint extract or liqueur
For the Pastry:
- 2 1/2 cups all-purpose flour (310 g)
- 3 tablespoons cocoa powder
- 3 tablespoons sugar
- 1/2 teaspoon salt
- 3 tablespoons oil
- 3/4 cup cold butter (170 g)
- 1/2 cup ice water
For the Egg Wash:
- 1 large egg
- 1 teaspoon water
For the Mint Glaze:
- 1 cup confectioner's sugar (120 g)
- 1/4 cup milk (60 ml)
- 1 pinch salt
- 1/2 teaspoon mint extract
For the Chocolate Drizzle:
- 4 ounces chocolate (113 g)
Instructions
Make the Filling:
- In a 2 qt saucepan, add the cocoa, sugar, salt, butter, and milk. Heat on medium low, whisking often, until the butter has melted and the mixture begins to simmer. Simmer for 2-3 mintues, until the mixture begins to thicken, then remove from the heat.
- Stir the chopped chocolate into the cocoa mixture while it is still hot. Continue stirring until it has melted, then stir in the mint extract. Chill the filling in the refrigerator for at least 1 hour.
Make the Pastry:
- In a large mixing bowl, add the flour, cocoa powder, sugar, and salt. Stir until they are fully combined, then mix in the oil. You may have to mix with your hands to make sure that the oil coats all of the flour.
- Cut the butter into cubes and add it to the flour mixture. Use a pastry blender to cut the cubes of butter until they are no bigger than small peas. Then gently mix in the water and bring the dough together into one large mass.
- Flatten the dough into a rectangle and wrap it in plastic or paper, then chill it for at least 30 minutes.
Assemble:
- Line two baking sheets with parchemnt paper. Take the pastry dough out of the refrigerator. Sprinkle your work surface with flour and place the dough on it. Sprinkle more flour on top and flour your rolling pin. Roll the dough into a rectangle that measures 20 X 12 inches (50 X 30 cm.)
- With a bench knife, cut the dough along the 20-inch side every 5 inches (or 12.5 cm). This should give you 4 columns. Along the short side of the dough, cut every 3 inches (or 7.5 cm) to get 4 rows. You should now have sixteen 3 X 5 inch (or 7.5 X 12.5 cm) rectangles.
- Transfer half of the dough rectangles to the baking sheets, spacing them out evenly. Brush the egg wash along the edges of one rectangle, then place a spoonful of the filling in the center. Cover this rectangle of dough with one of the rectangles still on the work surface. Press a fork along the edges to seal the pastry. Repeat until you have 8 pastires, then return them to the refrigerator to chill for about 30 minutes.
- Preheat the oven to 350° F (180° C.) Bake the pastries for 25-28 minutes, then let them cool for about 30 minutes before frosting.
Decorate:
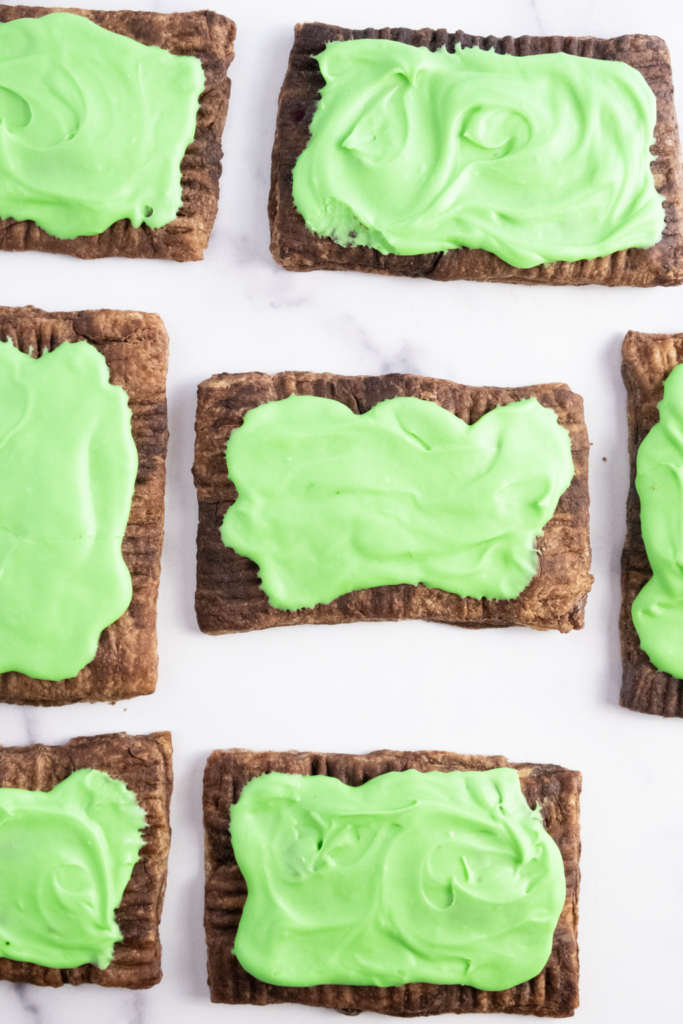
- In a medium bowl, add the confectioner's sugar. Slowly whisk in the cream, continuing to whisk until there are no lumps. Once the glaze is smooth, whisk in the green food coloring and the mint extract.
- Spoon the glaze over the tops of the pastries. If you want the glaze to firm up, let it sit for about 2 hours.
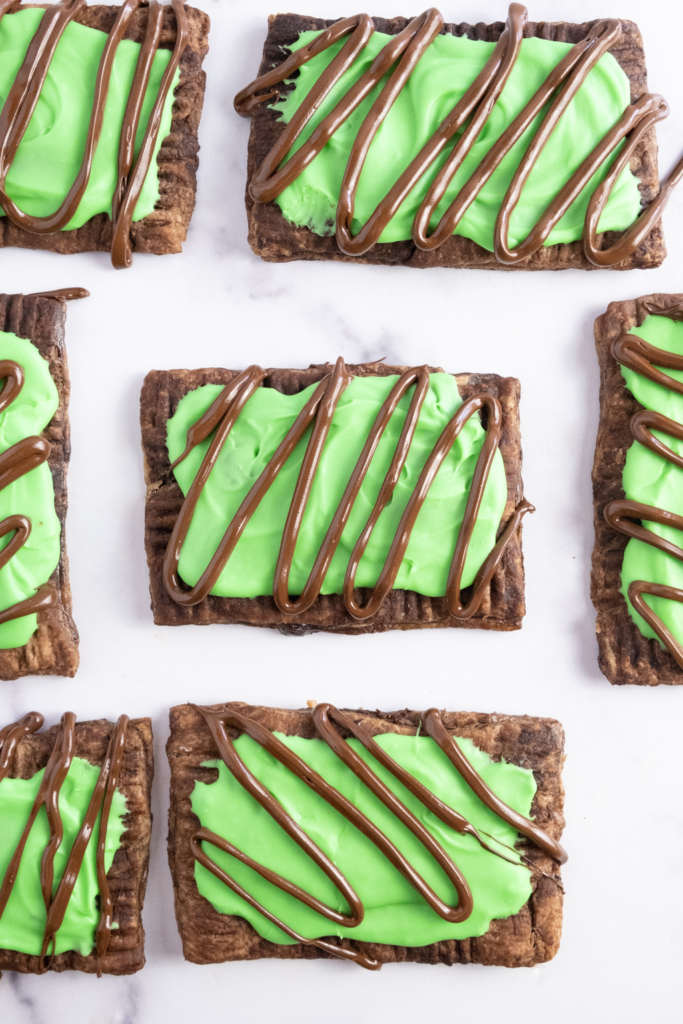
- Melt the chocolate in the microwave, cooking for about 15 seconds on high at a time. Once it is melted and smooth, transfer it to a pastry bag or a plastic bag with the corner cut off to make an opening of about 2 mm. Pipe chocolate stripes across the tops of the pastries.
- The pastries store well at room temperature for about 3 days.


This looks so good! What a great combination of flavors!
Thanks for sharing! Does it keep long?